

 Login / Register
  CATEGORIES
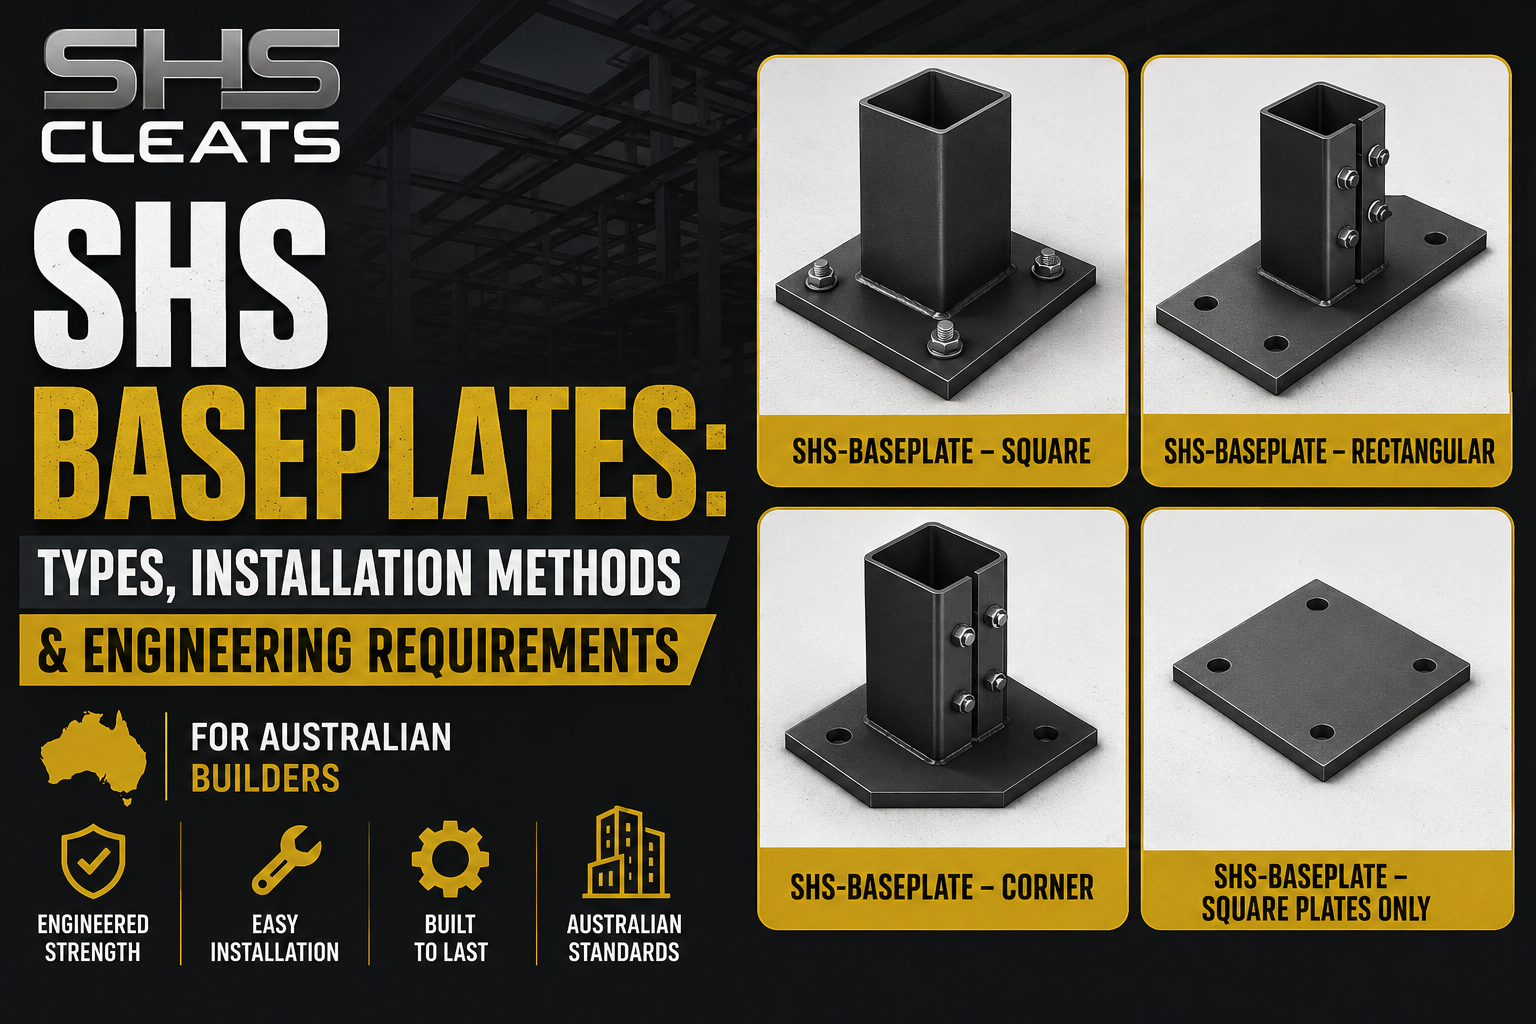
Every SHS steel column needs something to anchor it to the ground. That something is a baseplate — and while it might look like the simplest piece of hardware in the frame, getting it wrong causes more structural problems than any other connection on the job. Wrong bolt spacing, wrong bearing area, no levelling, or direct soil contact — any of these can lead to column movement, cracking, structural non-compliance, or failure under wind uplift.
This guide covers the full picture: what SHS baseplates are, the different types, how to match plate size to column size, the two main installation methods, engineering certification requirements in Australia, and the common installation mistakes to avoid on site.
What is an SHS baseplate?
An SHS baseplate is a steel plate welded to the base of a Square Hollow Section (SHS) steel column. Its purpose is to distribute the column load over a larger area of concrete and to provide a fixing point that anchors the column firmly to its foundation.
Without a baseplate, an SHS column sitting on concrete would transfer its entire load — including uplift — through the small end area of the tube wall. The baseplate spreads that load across a larger bearing surface and, via anchor bolts cast into or chemically fixed into the concrete, locks the column against both downward load and the upward pulling force of wind.
SHS baseplates must resist two key forces:
- Compression — the downward load of the structure bearing onto the column
- Uplift — wind suction and structural tension trying to pull the column upward out of its footing, particularly significant for verandah and carport roofs in Australian wind zones
Types of SHS baseplates
Square baseplate
The most common type — a square steel plate with the SHS column welded to its centre and bolt holes near the corners for anchor fixing. Used where the column sits clear of any walls or boundaries and can be bolted from all four sides. Standard configuration for freestanding verandah posts, carport corner columns, and deck support columns.
Rectangular baseplate
A rectangular plate where the column is positioned off-centre, allowing the plate to extend further in one direction than the other. Used where the column sits against a wall or near a boundary, or where the footing geometry restricts access on one side.
Corner baseplate
An L-shaped plate designed to sit at the corner of a concrete pad or the junction of two masonry walls. The SHS column is positioned at the inside corner of the L, with anchor bolt holes in each leg. Used where corner columns of a verandah or carport sit at the intersection of two walls.
Baseplate vs top plate: what is the difference?
An SHS baseplate goes at the bottom of the column — it connects the column to the foundation below. An SHS top plate goes at the top of the column — it provides a flat bearing surface for a beam or rafter resting on top of the column rather than connecting to its side face. Whether you need both depends on your structural arrangement.
Baseplate sizes for each SHS column size
| SHS Column Size | Typical Baseplate Size | Anchor Bolts | Typical Application |
| 65×65mm | 150×150mm | 4 × M10 | Lightweight pergola posts |
| 75×75mm | 175×175mm | 4 × M10 | Lightweight pergola, shade sail posts |
| 90×90mm | 200×200mm | 4 × M12 | Standard residential verandah |
| 100×100mm | 200×200mm | 4 × M12 | Verandah, carport, single-storey deck |
| 125×125mm | 250×250mm | 4 × M16 | Larger carport, elevated deck |
| 150×150mm | 300×300mm | 4 × M16 | Commercial verandah, large carport |
| 200×200mm | 350×350mm | 4–8 × M20 | Commercial, mezzanine, industrial |
These are indicative sizes only. The exact plate dimensions and bolt specifications must be confirmed against the engineering certification for your specific column size and project wind classification.
Installation method 1: SHS baseplate on a concrete pad footing
A concrete pad footing is a flat, horizontal slab of concrete placed at the base of each column position. The baseplate sits on top of the pad, anchored by bolts either cast into the concrete during pouring or chemically fixed after it cures.
Cast-in anchor bolts (preferred where the pad is being poured fresh)
Anchor bolts are positioned in a bolt template or cage before the concrete is poured, so they’re embedded when it sets. Once cured, the baseplate slides over the bolts, is levelled, and the nuts are torqued down. The critical requirement is precision: bolt positions must exactly match the baseplate hole pattern.
Chemically fixed anchor bolts (where cast-in is not possible)
After the concrete has fully cured, holes are drilled at the correct positions, blown clean with compressed air, and high-strength chemical anchor adhesive is injected before the threaded rod is inserted. Once cured, the bolts achieve high pull-out and shear capacity comparable to cast-in bolts.
Key steps for concrete pad installation:
1. Excavate and pour the concrete pad at the correct depth for your soil bearing capacity
2. Set anchor bolts using a bolt template while concrete is wet — or drill and chemically fix after full cure
3. Allow the concrete to reach full design strength before loading the baseplate
4. Set the baseplate over the anchor bolts and use packer plates to achieve precise level on all four sides
5. Where required, grout under the baseplate with non-shrink grout for full bearing contact
6. Fit nuts and washers and torque to the specified value using a torque wrench
Installation method 2: SHS baseplate on a concrete pier
Concrete piers — poured into an augured or hand-dug hole — are used in softer soils, on slopes, or in restumping applications. In house raising and restumping projects across Queensland and New South Wales, concrete piers are the standard approach.
Critical considerations for pier installations:
- Pier height above ground: The SHS column base and its baseplate should sit a minimum of 75mm above finished ground level. Soil contact holds moisture and causes accelerated corrosion at the column base.
- Pier diameter: Must be large enough to accommodate the anchor bolt pattern with adequate edge distance — typically 1.5× the bolt diameter from the pier edge.
- Bolt overhang at the pier top: Anchor bolts must protrude sufficiently above the concrete top to allow the baseplate, nut, and washer to sit correctly.
Engineering certification requirements in Australia
In Australia, baseplates for structural SHS columns require engineering certification to comply with the National Construction Code and to satisfy building permit requirements. The certification confirms:
- The allowable compression load the baseplate transfers to the concrete
- The allowable uplift force the anchor bolt pattern can resist
- The required anchor bolt specification — size, grade, and minimum embedment depth
- The minimum concrete compressive strength required beneath the baseplate
SHS Cleats provides engineering certification documentation for all baseplate products. For most residential projects, this documentation is sufficient for a building certifier. For commercial projects or cyclonic wind zones (C2 and above), the project’s structural engineer will review and certify the connection.
Common installation mistakes to avoid
- Wrong anchor bolt spacing. If bolts are set before the baseplate arrives, measure twice against the actual product. The bolt hole pattern is fixed — bolts out of position mean the baseplate won’t fit.
- Insufficient edge distance at the pier. Bolt holes too close to the pier edge significantly reduce pull-out capacity. Always confirm minimum edge distances against the engineering specification.
- No levelling under the baseplate. A baseplate bearing on an uneven surface concentrates load on the high points. Pack and grout to ensure full, even contact.
- Direct soil contact. Never allow the SHS column or its baseplate to contact soil. Maintain minimum 75mm clearance above finished ground level.
- Overtorquing anchor bolts. Tightening beyond the specified torque value can strip threads or crack the surrounding concrete. Use a calibrated torque wrench.
- Ignoring cut-edge corrosion. Where the baseplate has been cut on site, treat exposed steel edges with cold galvanising compound before installation.
Frequently Asked Questions
For a 100×100 SHS column in a standard residential application, a 200×200mm baseplate with four M12 anchor bolts is typical. The exact size depends on the applied load and the project wind classification. Always confirm against the SHS Cleats engineering certification for your specific column size before ordering.
Use chemical anchor bolts. Drill holes at the correct positions to match the baseplate hole pattern, blow clean with compressed air, inject high-strength chemical anchor adhesive, and insert the threaded rod. Allow full cure time before loading. Installed correctly in sound concrete, chemical anchors achieve pull-out capacity comparable to cast-in bolts.
Yes. All baseplates used in external or exposed applications must be hot-dip galvanised to AS/NZS 4680. All SHS Cleats baseplates are hot-dip galvanised as standard. The baseplate-to-concrete interface is a primary corrosion risk point — galvanising at this location is not optional.
Yes, with correct specification. Hot-dip galvanised baseplates perform well in C3 and C4 corrosion categories covering most coastal Australian environments. Within 200 metres of breaking surf, specify stainless steel anchor bolts in addition to hot-dip galvanised baseplates.
A baseplate connects the bottom of the column to the foundation. A top plate caps the top of the column to provide a bearing surface for beams or rafters resting on top of the post. Both are manufactured to suit each SHS column size.
Most structural column installations — verandahs, carports, decks, mezzanines — require a building permit in Australia. The permit documentation will include the baseplate engineering certification. Contact your local council or a registered building certifier for project-specific requirements.
Ready to order SHS baseplates? Browse our full range of square, rectangular and corner SHS baseplates — all hot-dip galvanised to AS/NZS 4680, engineering certified, and available for all SHS column sizes from 65×65 to 200×200mm. Same-week dispatch from Brisbane, Sydney and Coffs Harbour. View the SHS baseplate range at shscleats.com.au →
